Contents of the guide Show ▾
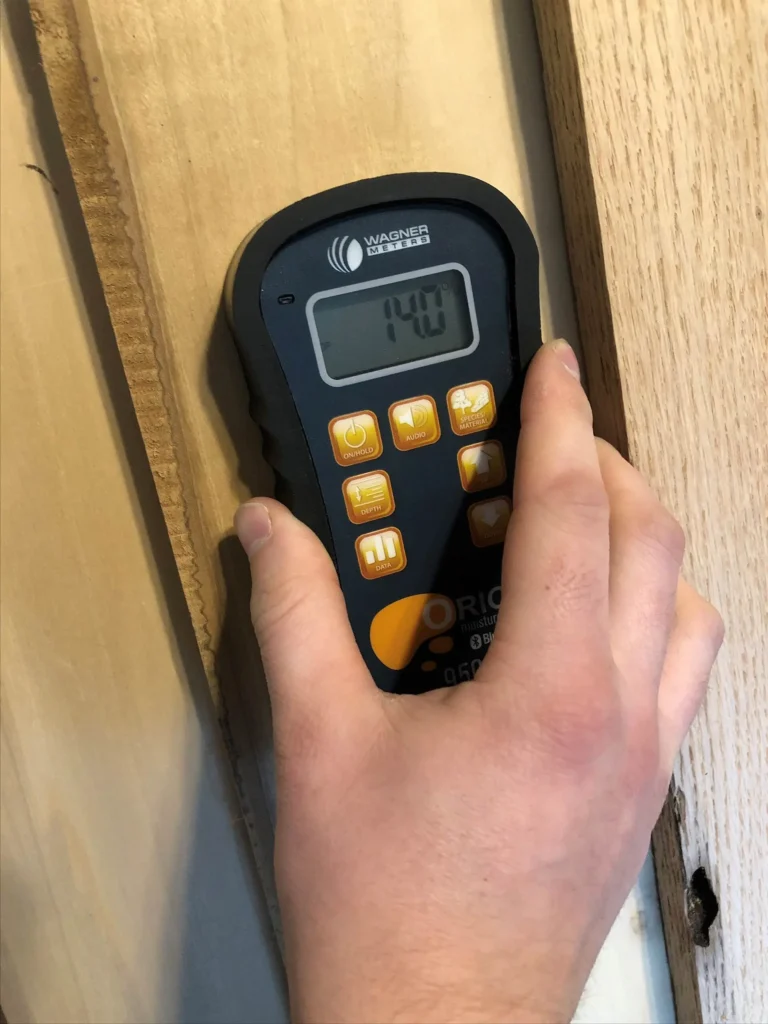
Quick answer A damp test on a motorhome means measuring the moisture content of the walls, roof and floor with a moisture meter, mainly around windows, roof hatches, corners, trims and cable entries. Do it once a year and always before you buy a used motorhome. There is no single limit value: the reading depends on the meter and the material, and makers set their own limits in their warranty terms. What matters is comparing measuring points and seeing changes over time.
The essentials at a glance
- Damp often doesn’t show until the damage is extensive. Measure rather than look.
- Test every year and keep the report. It increases the value when you sell.
- Check the warranty terms: many makers require regular damp tests for the water-tightness warranty to apply.
- Compare measuring points with each other and with last year’s readings.
- Fix the leak straight away. Drying out doesn’t help if water keeps getting in.
Where damp gets in
| Risk zone | Why |
|---|---|
| Windows and roof hatches | Sealant and seals age and crack |
| Roof fan and solar cable entry | Holes in the roof, water sits |
| Corners and trims | Joints in the body, movement while driving |
| Awning and bike rack mounts | Screws through the wall |
| Floor by the doors | Snow and water come in, leaks from the water system |
On a panel-van conversion the risks are partly different from a motorhome with sandwich walls. Condensation behind the insulation against the metal is common, and there damp causes rust rather than rot. Read more in the guide on rust protection on a panel van.

How a damp test works
- Let the vehicle stand dry and at room temperature. Measuring straight after rain or in the cold can give misleading readings.
- Measure systematically around every window, hatch, corner and cable entry, and at a few reference points in the middle of walls that should be dry.
- Note down the reading and position of each point, ideally on a sketch.
- Compare: a point that stands out against the reference points, or that has risen since last year, is a sign of a leak.
- Follow up with a motorhome specialist if you find readings that stand out.
Tip A simple moisture meter for wood shows relative changes, but the readings are not directly comparable with a professional damp report. Use the same meter every time so you can compare over time.
Limit values for damp
There is no statutory limit value for damp in motorhomes in Sweden. The reading depends on which meter is used and which material is measured. Makers and motorhome service centres set their own limits for when a point counts as damp. So ask for an explanation of the readings when you get a report, and check what applies under your maker’s warranty.
Checklist as PDF: Used campervan buying checklist (in Swedish). All checklists
Damp test when buying a used motorhome
Ask the seller for previous damp reports, and do your own test before buying. Sniff for a musty smell, press gently on walls and floor around windows and corners, and look for discolouration and bubbling wallpaper. The full buying inspection is in the buying checklist.
Find and fix the leak
- Remove old sealant and reseal with a sealant made for motorhomes.
- Check screws through the body and seal them.
- Dry out damp-damaged material. Rot in a timber frame often means opening up the panel.
- Measure again after a few weeks to see that the readings fall.
Yearly damp check
- Measure around all windows and roof hatches.
- Measure around the roof fan and solar cable entry.
- Measure in all corners and along trims.
- Check the sealant on the roof.
- Compare with last year’s report.
- Keep the report.
Condensation: the damp you create yourself
Not all damp comes from outside. Breathing, cooking, wet clothes and drying towels add a lot of water to the air in a small living area. When warm, moist air meets cold metal or cold windows, it condenses. In a panel-van conversion the condensation can collect behind the insulation and against the metal, where you can’t see it.
- Ventilate with a roof fan or open hatches, even in winter.
- Avoid drying clothes inside if you can.
- Insulate against cold metal and avoid air gaps where moist air can reach the metal. Choose materials and vapour barrier carefully.
- Heat evenly: an even temperature gives less condensation than heating hard for short periods.
Damp during winter storage
A motorhome that stands still all winter without ventilation can collect damp, especially if it is covered with a tight tarpaulin. Leave roof hatches in the vent position, open cupboards and interior doors, and check the vehicle during the winter. Follow the service plan and the winter storage guide for the rest of the storage.
Signs of damp damage
| Sign | What it can mean |
|---|---|
| Musty or mouldy smell | Damp in the interior, insulation or timber frame |
| Discoloured or bubbling wallpaper | Water has got into the wall |
| Soft wall or floor | Rot in the timber frame or floor panel |
| Rust streaks from screws and trims | Water is getting in through the fixing |
| Black mould in corners and by windows | Condensation and poor ventilation |
When should you call in a professional?
If you find readings that stand out in several places, soft areas in walls or floor, or damp that doesn’t fall after resealing, it’s time for a motorhome specialist. A professional damp report documents the measuring points and readings, which is needed for warranty claims and valuable when you sell. Ask whether they measure with the same type of meter every year and whether you get the report with a sketch of the measuring points. Also check whether your insurance covers damp damage, as many policies exclude damage that has developed gradually.
Thinking of building your own instead of buying? Read about what is required for a passenger car class 2 (Swedish rules).
Frequently asked questions
How often should I damp-test my motorhome?
Once a year, and always before buying a used motorhome.
What is a normal damp reading in a motorhome?
There is no single limit value. Readings depend on the meter and the material. Compare measuring points and changes over time, and follow the maker’s limits.
Is a damp test required for the warranty?
Often, for motorhomes with a water-tightness warranty. Check the terms for your vehicle.
Can I damp-test it myself?
Yes, with a moisture meter you can follow changes. For a report that will stand up for a warranty claim or a sale, use a motorhome specialist.
Do panel-van conversions get damp damage?
Yes. Condensation behind the insulation and leaks at cable entries cause rust and mould. Ventilation and sealing are important.
Further reading
- Camperliv, Campervan maintenance: service plan
- Camperliv, Buying a used campervan: checklist
Last checked: October 2026.
New checklists and guides, plus reminders before winter storage and inspection. A few emails a year, nothing more.
The content is based on my own experience and the rules that applied when the text was written. Rules can change, and I am not responsible for factual errors or rule changes that affect your build or maintenance. Read the full disclaimer.

Linus Thell
Founder of Camperliv.se. Has worked with vehicles for essentially all of his adult life.
Read more about Linus →